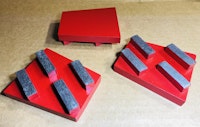
Concrete Grinders - Walk Behind
I sell quality Eibenstock, Taman and Master Finish concrete grinders in Perth, W.A.
For tips on grinding, see information on cup wheels here, or grinding shoes here.
Some of these grinders have very big motors. Try to put your vacuum on a seperate circuit, or at least a seperate power point.
This will allow the bigger saws to draw their rated power, and perform as specified.
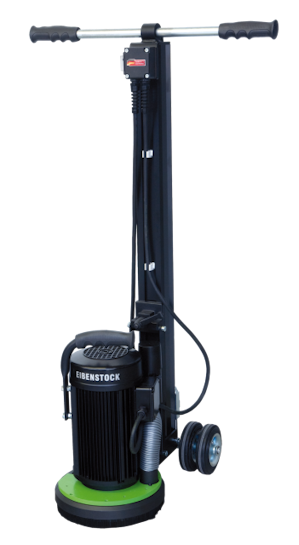
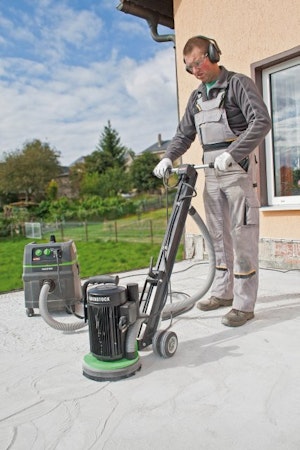
Eibenstock Concrete Floor Grinder 235mm EBS235.1- $2,950 incl GST |
German quality |
|
|
Use:
Features:
|
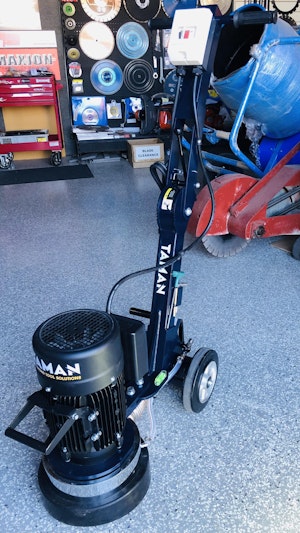
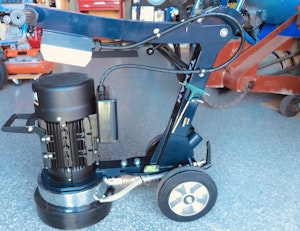
CFG250 Concrete Floor Grinder
|
In stock now |
|
|
Features:
|
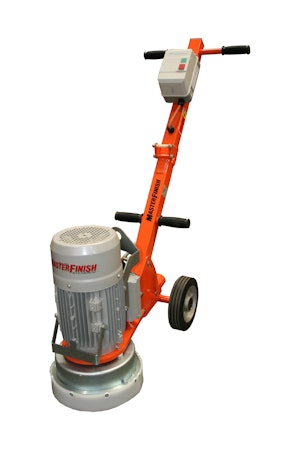
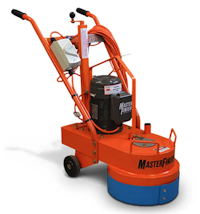
Master Finish Cub Floor Grinder |
$2195 incl GST |
|
|
Master Finish Cub properly prepares any floor. Features: • Wet and dry use Specifications • Plate Size — 250mm |
|
Cub grinder accessories: |
|
|
|
Plates sold separately - 250mm diameter: I carry a basic range of Lavina and Redilock diamond shoes to suit above plates - see range here |
|
|
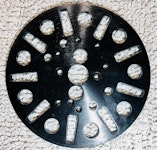
Tyrolit 250mm/10" Grinding Plate with 10 diamond segments. $350 incl GST ea Typhoon Heavy Duty 15M Extension Lead. |
|
Masterfinish G1-A Grinder consumables |
|
|
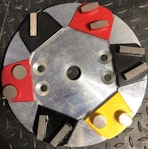
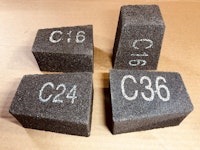
Wedge - abrasive segment |
|
|
Wedge diamond block - medium grit |
|
Prices correct as of 1/3/25 but subject to change.
See a range of Eibenstock grinders in action here:

For the operation and spare parts manuals for these machines Click Here
Silica dust - when workers crush, cut, drill, polish, saw or grind products that contain silica, particles are created, which are one-hundredth of the size of a grain of sand. These can get stuck deep in the lungs.
Ensure precautions to limit exposure to dust are in place.
See the WA government's info on silica dust here.
Using a Cub Grinder:
Download the operation manual from here.
Follow all recommendations for safety, heavy duty extension cords, PPE etc.
It is impossible to make a recommendation on YOUR grinding job. Every job is different.
This grinder is designed for both dry and wet grinding.
When dry grinding, ensure a suitable industrial vacuum is connected and that operator is wearing suitable breathing respiratory equipment.
When wet grinding, do not use a vacuum, but use an RCD device inline or on the circuit board.
- Cub grinders have big motors - ensure there is sufficient power available to run them. A 15amp circuit is best - sometimes there is one in the house on a seperate breaker just for the electric oven.
- Do not run off generators - they may not be 240 volt, 50Hz, or are usually too small for the grinder.
- Use only heavy duty (2.5 mm2 minimum but preferably or 4 mm2) extension cords and keep them as short as possible (under 15m).
- Put vacuums on a seperate circuit to the grinder so as not to overload each circuit.
- Heavy grinding can trip out a 10amp circuit. Allow the grinder to do the work and don't force it. More segments is a lighter electrical load.
- If the thermal overload trips out, allow it to cool then reset. Constant tripping indicates a problem.
Starting the Grinder:
1. Check the grinding plate (or shoes) being used are suitable for the material being ground and they are balanced correctly.
2. Check that the grinding plates and shoes being used are in good order and properly attached, with all countersunk bolts firmly in place. Check this occasionally during use, as they can work loose during operation.
3. Check that all height adjustment knobs and the folding handle latch are tight and firm.
4. Raise the grinding plates from the floor.
5. Start the motor by pressing the green switch on the starter box.
6. Lower the grinding plate and commence grinding.
7. To stop unit, press the red switch on the starter box.
Steps to grinding a concrete floor:
- Know the Surface – A cub grinder is suitable for removing trowel marks, joint surfaces, paint, glue, surface blemishes and high spots. They are not for aggressive profiling and shaping.
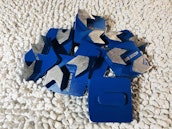
- Prepare the surface – If the floor has some coatings on it (even small patches), these need to be removed before grinding with a specialised shoe. Arrow or PCD shoes can be ideal to start with. One run over maybe not enough, and proper surface rehabilitation must be done over several steps, each step graduating to the next to ensure a smooth finish to the floor.
- Select the correct diamond shoe:
– Each particular floor is going to dictate your choice of diamond shoe. There are a number of things to consider which diamond segment is appropriate.
- The bond is the material that initially holds the diamonds in place, but also wears away to expose the diamonds. A hard bond is best when dealing with abrasive material like soft concrete or rain-damaged concrete.
Medium bond tends to perform poorly with hard materials, but wears away more quickly on abrasive materials. Soft bonds are ideal on hard materials because it wears away quickly, exposing a layer of diamond to grind the surface.
- Grit is the diamond size in the bond, and ranges from coarse to fine. Start with a coarse grit (16-30 grit) to remove the uneven areas. Double the grit size with each stage, gradually breaking down the surface irregularities until the surface is sufficiently smooth.
#16 grit is very coarse for removing coatings like glue, lacquer, paint, epoxy etc
#25 grit is for rough grinding such as levelling and floor preparation.
#40/50 grit is for medium grinding applications
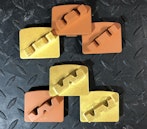
#80-#100 is for fine grinding - The shape of the diamond segments used has an impact too. Arrow heads have sharp leading edges for slicing and are effective for glue removal. Square segments have a long leading edge, so are ideal on uneven concrete. Round headed diamonds have a subtle leading edge so are perfect for working with finer grits. Generally, segments with a sharper leading edge tends to deliver more aggression, while tapered shapes tend to deliver better dispersion.
- Shoes with one only segment are generally for lighter, smaller grinders eg Cub grinders, whereas shoes with two segments per shoe suit heavy three phase machines.
- Select the right number of shoes - More shoes means more segments, which is a lighter electrical load.
- Use correct grinder weight – The weight on the machine can affect the wear and tear on the machine, as well as effectiveness of grinding. Allowing the full weight of the grinder down is more aggressive on the surface, where as a light pressure on the handle lifts the grinder and is less aggressive. Alternatively, use less shoes, or shoes with one segment not two to increase the pressure. Six shoes is usually adequate on a cub grinder.
General shoe recommendation:
It is impossible to make a recommendation on YOUR grinding job. Every job is different.
But most jobs with a Cub style grinder can achieve good results with:
- Three or six single segment shoes, soft/medium bond for hard concrete. #25 grit for first pass.
(Experiment with 3 or 6 shoes for best balance of speed of cutting and shoe life) - Three or six single segment shoes, soft/medium bond for hard concrete. #80 grit for second pass.
Using the Grinder:
1. Check the grinding plate (or shoes) being used are suitable for the material being ground and they are balanced correctly.
2. Check that the grinding plates and shoes being used are in good order and properly attached, with all countersunk bolts firmly in place. Check this occasionally during use, as they can work loose during operation.
3. Check that all height adjustment knobs and the folding handle latch are tight and firm.
4. Raise the grinding plates from the floor.
5. Start the motor by pressing the green switch on the starter box.
6. Lower the grinding plate and commence grinding.
7. To stop unit, press the red switch on the starter box.
Grinding Exposed aggregate with Cub Grinder:
Some operators use half hard bond and half soft bond, to cope with the two different hardnesses in the floor (for the aggregate and the concrete).
Others use a hard bond with water. Try lots of segments, or double segments, to reduce bouncing.
Grinding Concrete:
It is hard to guess the hardness of concrete. We suggest you start with a hard bond (for soft concrete). If it is not cutting, or is very slow, try a softer bond.
Grinding hard concrete does not produce much dust, and it is usually soft and non abrasive.
The diamonds cut and break as normal, but the metal bond surrounding them is not worn away easily without the dust, so the diamonds are not exposed as much as with soft concrete. The diamond segment glazes over and stops working and rubs on the floor instead of cutting it. You can use larger diamonds (around #25 grit) to increase dust production. Also, reduce the surface area with fewer segments to increase the weight per square centimetre.
Grinding soft concrete usually produces sufficient gritty, abrasive dust that will wear away the bond and expose the diamonds adequately. In fact, too much dust can cause the grinding wheel to wear too fast, so vacuum up excess dust. Reduce the weight on the wheel or increase the surface area with more segments to reduce the weight per square centimetre.
Inspect your grinding shoes regularly to make sure diamonds are exposed adequately and that they are not overheating . Even the best shoes will perform badly if used in the wrong application.
Tips:
Dampening the concrete before grinding, or even spraying a little water may assist with your job ( be careful mixing water with electricity - use an RCD). It will make a grinding paste.
Similarly, clean builders sand on the surface, or reducing dust extraction, will help the grinding process.
A grinding compound such as Worx+ Totally Cut Sikk can assist grinding.
Remember - every job is different. The enormous combinations of different types of surfaces, different shoe styles, with many different bonds and grits, plus different machines and varied operator experience means it is impossible to guess what will give the perfect result the first time. Some experimentation is often necessary to achieve the required results.
Important:
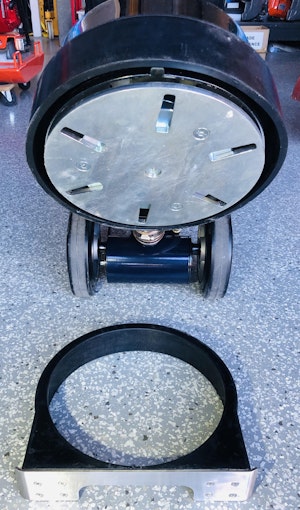
To minimise plate wear and reduce vibration, and to prolong life of flexible coupling, rotate shoe plate every 2 hours of use.
Rebalance cub grinders:
(Not applicable CFG250 with Morflex coupling)
Disconnect power and tilt machine over backwards.
If you experience uneven wear, spin the shoe plate by hand and see if it spins evenly.
Try removing the shoe plate and rotating to see if that balances it. You may need to try all four possibilities to get best result.
Otherwise remove the two bolts holding the plate to the rubber coupling, and turn it 180°.
Couplings:
The coupling between motor and plate is a rubber pivot. It will eventually need replacing, depending on amount of use.
The CFG250 Morflex will last approximately 2 - 3 years even with regular use.
Disclaimer: the information on this website is provided in good faith and believed to be reliable and accurate at this time. However, the information is provided on the basis that the reader will be solely responsible for assessing the information and its veracity and usefulness. UDT shall in no way be liable, in negligence or howsoever, for any loss sustained or incurred by anyone relying on the information, even if such information is or turns out to be wrong, incomplete, out-of-date or misleading.


